Fundamentals: Helicoids and Dismantling (3/3)

Now that we have talked about screws and lubrication, we can finally start with the actual skills for repairing classic Nikkors. Most of the things that I’ll mention here are based on common sense. Please refer to my previous blog posts because there are many important things that were mentioned there that will not be repeated here.

Helicoids are simple yet they can be very frustrating to work with, many get stuck here because they don’t know how to service them. Even experienced repairers like me get stuck occasionally if we got a lens that was reinstalled the wrong way or if we slipped.

Workplace:

Be sure that you are working at a well-ventilated place since the fumes can potentially be toxic. Disassemble your lens on top of a soft, clean cloth such as a towel to prevent anything tiny such as screws to bounce-off your table. That same towel will also prevent any serious damage to the glass if you’ve accidentally dropped one.

You should buy those little medicine organizers. They are cheap, small and perfect for organizing screws and parts as you disassemble your lens. What I simply do is I group all of the screws from the exterior to one section and all of the screws and fittings from the interior into another. This will make things a lot simpler when it’s time to reassemble the lens.

You may also want to put a ground on your table if it’s made of metal so that you discharge any static electricity. This can prevent you from shorting any sensitive electronics found in modern lenses.

Rest Position:

Before you begin taking apart your lens, set the lens to its “rest pose” first by turning the focusing ring to infinity and for zooms, set them to the shortest focal length or the longest one depending on which lens you are working on at the moment. I call it the “rest pose” because this is my point-of-reference. I will at the very least know how things were aligned when looking over my reference and notes.

Taking Notes:

No lens are ever made the same. There will be times when even seemingly similar lenses will have no interchangeable parts. In the case of the Nikkor-S 5cm f/2 Auto and the near-identical Nikkor-S the 50mm f/2 Auto, only the two outer barrels are interchangeable. So do not assume that if you opened a lens the other one will be the same even if they seem identical. There will always be some individual production differences unique to a specific lens like the placement of the focusing spacers, calibration screws, spacers, etc. that were secured differently, this also happens within the same production model since improvements are constantly made in-production.

One way to take note of something is to take pictures of it for reference, in different angles as well if you need to. Back in the days at the watch repair shop, our technicians would draw and sketch each critical step so they will have a reference to go back to if they need to reassemble a watch. We had a lot of notebooks full of sketches and we kept them for future references.

Today in 2016, almost all mobile phones have good cameras built-in. Taking notes now is as simple as taking multiple photos of each step of the process.

IMG_1680

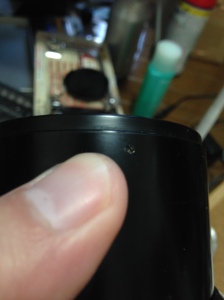
This photo shows an example of what we have discussed in actual practice. The helicoid alignment is critical, before taking it apart it is important that we take note of how this looks like before we dismantle it. Getting this back together in the wrong position will result in a lens that won’t turn properly.

A perfect example of something that you’ll need to take notes of in different angles is the aperture assembly to note how things look like and also to note the position of the various parts in relation to each other.

A good way for taking notes is by marking. Some people prefer the use of a lead pencil to mark any key positions because lead pencils won’t leave any permanent marks. I prefer to simply scribe little marks on the surface using a sharp tool. This will leave permanent marks on the lens so only scribe the marks on the surface of the lens where it will not be seen. What I usually do is scribe lines, arrows and small marks like number or a the triangle.

This practice is fairly common, even brand-new lenses that came out from the factory have them. This will also indicate that a lens has been serviced by another person prior to you opening it. They are permanent footprints but necessary for future reference when you need to reassemble a lens.

The most common steps or places to mark are:

IMG_1680

The “rest pose” if the barrel is turned to infinity. I’d mark the helicoids and the barrel so that a line goes through all of them. This is my reference line to check if I reassembled my lens properly.

IMG_1682

You should definitely mark where the helicoids separate. Forgetting to do this will cost many hours trying to figure out how to get your helicoids back together properly. Mark a line against a common reference point such as an eyelet or the infinity mark.

IMG_1445

The rest pose of the helicoid key and helicoid stops are optional, it can come it handy later to check if things were all aligned properly. It’s only essential for lenses that are complicated such as those that come with CRC.

IMG_1531

Any adjustable screws or fittings that you plan on removing. These things should never be tampered with in general unless necessary.

IMG_1279

You should mark anything you think will be important for reassembly. This mark was made by somebody else. It is just a reminder so he’ll know if this part is seated properly or not.

This video should help you get started really quick, please study how I did it in this video, try to make sense of what I was doing while referring to what I wrote above.

These should give you a solid idea as to how and where to take notes. Many people don’t do this and they end up with a pile of spare parts. Do not make the same mistake and take plenty of notes as you go.

Avoid These:

As a general rule you should dismantle everything for a thorough cleaning if the lens is filthy. You’ll have to remove any germs in the lens along with a whole host of nasty things like old grease and oil. There are things that you should avoid, though. Some parts are so delicate that they’re best left alone unless they’re filthy, too. I will show you some of the things that I avoid if I can help it. There are times when opening these up will cause more harm if you don’t have the right tools.

IMG_1452

Leave any ball bearings and their assembly alone. You don’t want to pick up any of the tiny balls up do you? I rarely dismantle these, they take plenty of time to put back and I sometimes have no patience for it.

IMG_1569

Also leave any springs alone. Trying to remove or play with one will send it flying across the room. The best you can do is decouple them at one end and then work on the rest of the lens or the part attached to it. There will be that odd time when removing one is the only option and you should remove the spring with care so you won’t stress it by over-extending it.

IMG_1593

There are things that don’t seem to be removable and its best to leave them alone. Some parts are either glued or cemented, you’ll never get them off in a safe manner, causing irreversible damage. Just leave them alone than risk damaging them.

IMG_1531

Do not even think of attempting to remove or modifying any screws or keys that are involved involved in calibration and alignment unless you have to. If you do not get these right after you have undone them then your lens will not focus properly and you will waste a lot of time figuring out how things should be aligned.

I usually take plenty of notes if I have to dismantle any of these just in case. It’s very risky and I don’t want to take any chances. This is what separates an amateur from an experienced repairer. An experienced repairer is not perfect but we make less mistakes compared to beginners.

Dismantling:

Dismantling an old lens may sound easy, watching the pros work will even make you believe that as well. In reality things are rarely that easy and the chance for a failed project due to bad practices is high. Follow some of my advices to prevent damaging anything.

IMG_1164

A grippy rubber glove is essential for dismantling. Not only do these help you by adding more friction to your grip, they also serve as protection for your skin from abrasion and cuts.

IMG_1661

Some parts are held together by a weak adhesive like lacquer. This practice is common on the objective to prevent it from misalignment, it keeps it from unthreading due to vibration or other movements. If something is stuck, put a tiny amount of acetone into the thread by using a pair of tweezers. Leave it for a while and try again, if it still didn’t budge then repeat the steps again until it does. If this still won’t work then give the acetone more time to work on the seal. Apply acetone to a spot on the thread, let capillary action take it into the rest of the thread. Don’t put too much as it might dissolve anything that you do not intend to dissolve such as optical cement.

IMG_1662

In relation to the previous photo there will be times when you’ll find a hole in some of the metal rings and retainers. These are used to fill lubricants as well as to apply any adhesives to prevent these from getting undone. Apply acetone here as this will make sure that the acetone will get to every corner of the thread. A strong alternative to acetone is butanol (MEK) but it is much more aggressive.

IMG_1153

Always use the proper tool for the job. Using the wrong tools for the job will only result in failure. I don’t want you to repeat my mistakes so I am taking my time to write this blog.

IMG_1431

Screws on the bayonet can be a pain. Loctite was used to lock these. Loctite responds to heat so heating that nasty & tight screw with a soldering iron until it is too-hot-to-touch will help but to heat things faster, I use a butane torch. Another way to undo a tight screw is to apply MEK to the head. This takes more time because you’ll have to wait for the solvent to work on the seal and you will find yourself applying MEK repeatedly.

Using the right type of driver negates the need for the tricks that I outlined above. That is why I stress the need for buying the right drivers. Read what I wrote about screws and drivers to find out more.

I also use a Wiha magnetizer to magnetize/de-magnetize my screwdrivers so the screws won’t accidentally drop anywhere when I unscrew them. It will also make the task of positioning the screws much easier.

IMG_1154

Use a lens sucker to pull out glass elements that are situated deep-inside of a lens barrel. Simply trusting gravity to do the work for you is dangerous, it might scratch the edges of the your element and lead to a chipped edge.

In relation to removing elements, make sure to always work with the barrel facing up specially when you are removing the small screws that secure the objective to the helicoid. The objective is usually heavy, removing the screws will send it free-falling to the floor.

IMG_1615

Some parts are held together by scotch tape. Make sure to mark any place for reference. Clean the old adhesive marks left behind by the old tape.

IMG_1139

Use extra care when removing the rubber grips. The zooms and longer focal lengths will have wider rubber grips, these tear rather easily. Old rubber is brittle due to age and may break or tear eaisly.

IMG_1611

The tiny set screws are usually 1.4mm or 1.7mm headless screws. They are easily damaged because they’re usually brittle. You can lose one easily and it’s best to secure these with a tape so they won’t get misplaced, they’re tiny and just about the size of the seeds on top of a Jewish doughnut.

IMG_1065

For lenses with 2 helicoid keys, always remember which key goes to which slot. They are broken-in together so mismatching them isn’t a good idea.

IMG_1518

Screws that are being held by red lacquer require no prior preparation like acetone treatment for unscrewing them. These serve more as a seal of some kind to find out if a lens has been tampered rather than a seal. There will be times when leaving the marks there is good since you can use them later as reference when reassembling.

Conclusion:

This article mainly focuses on working with lenses but I will add tips in the future that pertains to camera repair. Camera repair is more involved and I don’t know if I can catalog everything in this article but I will see what I can do.

That’s it for this article. I hope that this answered most of your questions, it is important to follow this article as best as you can if you’re a beginner. It’s not easy to find people who are willing to show you the ropes. While I’m not a professional repairer I am willing to share my experience with you so you won’t create mistakes and ruin a valuable lens or camera. Thank you all for the support, please continue supporting my work so it can continue helping people in the future. See you again in my next article, Ric.

Help Support this Blog:

Maintaining this blog requires money to operate. If you think that this site has helped you or you want to show your support by helping with the site’s upkeep, you can make a small donation to my paypal.com (richardHaw888@gmail.com). Money is not my prime motivation for this blog and I believe that I have enough to run this but you can help me make this site (and the companion facebook page) grow.

Buy me a roll of film or a burger?

Thank you very much for your continued support!

$2.00

Helping support this site will ensure that this will be kept going as long as I have the time and energy for this. I would appreciate it if you just leave out your name or details like your country’s name or other information so that the donations will totally be anonymous. This is a labor of love and I intend to keep it that way for as long as I can. Ric.

180 Comments (+add yours?)

  1. Trackback: Best Practices (part 2)… | richardhaw
  2. Trackback: Repair: GN Auto-Nikkor 45mm f/2.8 | Richard Haw's Classic Nikkor Maintenance Site
  3. Trackback: E 75-150mm f/3.5 | Richard Haw's Classic Nikkor Maintenance Site
  4. Trackback: Repair: Fungus Cleaning | Richard Haw's Classic Nikkor Maintenance Site
  5. Trackback: Repair: Zoom-Nikkor 43-86mm f/3.5 (1/3) | Richard Haw's Classic Nikkor Maintenance Site
  6. Trackback: Repair: Nikkor 135mm f/2.8K/Ai/Ai-S | Richard Haw's Classic Nikkor Maintenance Site
  7. Trackback: Nikkor 200mm f/4 K/Ai | Richard Haw's Classic Nikkor Maintenance Site
  8. Trackback: Repair: Nikkor-Q 135mm f/3.5 | Richard Haw's Classic Nikkor Maintenance Site
  9. Trackback: Repair: PC-Nikkor 35mm f/3.5 | Richard Haw's Classic Nikkor Maintenance Site
  10. Trackback: Repair: Nikkor 35mm f/2.8 Ai | Richard Haw's Classic Nikkor Maintenance Site
  11. Trackback: Repair: Micro-Nikkor 5.5cm f/3.5 (1/2) | Richard Haw's Classic Nikkor Maintenance Site
  12. Trackback: Repair: Nikkor 50mm f/1.2 Ai-S (Dust Removal) | Richard Haw's Classic Nikkor Maintenance Site
  13. Trackback: Repair: Nikkor-Q 135mm f/2.8 | Richard Haw's Classic Nikkor Maintenance Site
  14. Trackback: Repair: Helicoids | Richard Haw's Classic Nikkor Maintenance Site
  15. Trackback: Mod: Nikon Df Split Prism | Richard Haw's Classic Nikkor Maintenance Site
  16. Trackback: Repair: Noct-Nikkor 58mm f/1.2 Ai-S | Richard Haw's Classic Nikkor Maintenance Site
  17. Trackback: Internet Nikon Repair Resources – My Take on Photography and Diving (Underwater Photography Mostly)
  18. Trackback: Mod: Alternative Ai Conversion Method | Richard Haw's Classic Nikkor Maintenance Site
  19. Trackback: 36~72mm f/3.5 Nikon Lens Series E Disassembly and Cleaning – My Take on Photography and Diving (Underwater Photography Mostly)
  20. Trackback: Repair: Zoom-Nikkor 43-86mm f/3.5 (2/3) | Richard Haw's Classic Nikkor Maintenance Site
  21. Trackback: Repair: Nikon PN-11 Extension Tube | Richard Haw's Classic Nikkor Maintenance Site
  22. Trackback: Repair: Nikkor-O 35mm f/2 | Richard Haw's Classic Nikkor Maintenance Site
  23. Trackback: Repair: “Shneideritis” & Edge Separation | Richard Haw's Classic Nikkor Maintenance Site
  24. Trackback: Repair: Nikkor 85mm f/2 Ai-S | Richard Haw's Classic Nikkor Maintenance Site
  25. Trackback: Repair: Nikon FE Camera Back Lock | Richard Haw's Classic Nikkor Maintenance Site
  26. Trackback: Repair: Nikon F Eye-Level Finder | Richard Haw's Classic Nikkor Maintenance Site
  27. Trackback: Repair: Nikon F Photomic Ftn (Foam) | Richard Haw's Classic Nikkor Maintenance Site
  28. Trackback: Repair: Nikkor-S 50mm f/1.4 | Richard Haw's Classic Nikkor Maintenance Site
  29. Trackback: Repair: Zoom-Nikkor 80-200mm f4 Ai-S | Richard Haw's Classic Nikkor Maintenance Site
  30. Trackback: Repair: Nikkor 50mm f/1.8 Ai-S | Richard Haw's Classic Nikkor Maintenance Site
  31. Trackback: Repair: Auto-Nikkor-Q 200mm f/4 | Richard Haw's Classic Nikkor Maintenance Site
  32. Trackback: Project: Ai Conversion | Richard Haw's Classic Nikkor Maintenance Site
  33. Trackback: Repair: Micro-Nikkor 55mm f/2.8 Ai-S | Richard Haw's Classic Nikkor Maintenance Site
  34. Trackback: Repair: New Nikkor 55mm f/1.2 | Richard Haw's Classic Nikkor Maintenance Site
  35. Trackback: Repair: Nikkor 28mm f/3.5 Ai-S | Richard Haw's Classic Nikkor Maintenance Site
  36. Trackback: Minolta MD Zoom 35-70mm f/3.5 Disassembly and Cleaning – My Take on Photography and Diving (Underwater Photography Mostly)
  37. Trackback: Repair: Nikon DE-1 Eye Level Finder | Richard Haw's Classic Nikkor Maintenance Site
  38. Trackback: Repair: Nikkor 50mm f/2K (New-Nikkor) | Richard Haw's Classic Nikkor Maintenance Site
  39. Trackback: 80-200mm f/4.5 Zoom-Nikkor.C Disassembly and Cleaning – My Take on Photography and Diving (Underwater Photography Mostly)
  40. Trackback: Repair: Nikkor-Q 20cm f/4 | Richard Haw's Classic Nikkor Maintenance Site
  41. Trackback: Repair: Micro-Nikkor-P 55mm f/3.5 Auto | Richard Haw's Classic Nikkor Maintenance Site
  42. Trackback: Repair: Zoom-Nikkor 43-86mm f/3.5 Ai (3/3) | Richard Haw's Classic Nikkor Maintenance Site
  43. Trackback: Repair: Micro-Nikkor 105mm f/2.8 Ai-S | Richard Haw's Classic Nikkor Maintenance Site
  44. Trackback: Repair: Nikon S2 Front Overhaul | Richard Haw's Classic Nikkor Maintenance Site
  45. Trackback: Repair: Nikkor-S.C 55mm f/1.2 | Richard Haw's Classic Nikkor Maintenance Site
  46. Trackback: Repair: Nikon Bayonet Screws (Video) | Richard Haw's Classic Nikkor Maintenance Site
  47. Trackback: Fujinon 55mm f/1.8 M42 (Early Version) Disassembly and Cleaning – My Take on Photography and Diving (Underwater Photography Mostly)
  48. Trackback: Nikon 50mm f/1.4 Ai Disassembly and Cleaning – My Take on Photography and Diving (Underwater Photography Mostly)
  49. Trackback: 50mm f/1.8 Nikon Lens Series E – Disassembly and Cleaning (updated 1 Apr 2017) – My Take on Photography and Diving (Underwater Photography Mostly)
  50. Trackback: 28mm f/2.8 Nikon Lens Series E – Cleaning – My Take on Photography and Diving (Underwater Photography Mostly)
  51. Trackback: Repair: W-Nikkor 3.5cm f/3.5 | Richard Haw's Classic Nikkor Maintenance Site
  52. Trackback: Nikon 35-70mm f/3.3-4.5 AiS Disassembly – My Take on Photography and Diving (Underwater Photography Mostly)
  53. Trackback: Repair: Auto-Nikkor-P 105mm f/2.5 | Richard Haw's Classic Nikkor Maintenance Site
  54. Trackback: Repair: Auto-Nikkor-P.C. 105mm f/2.5 | Richard Haw's Classic Nikkor Maintenance Site
  55. Trackback: Repair: Nikon SP/S3/S4/F Shutter Speed Calibration | Richard Haw's Classic Nikkor Maintenance Site
  56. Trackback: Repair: Nikkor-P 180mm f/2.8 Auto | Richard Haw's Classic Nikkor Maintenance Site
  57. Trackback: Review: Fujifilm Natura 1600 | Richard Haw's Classic Nikkor Maintenance Site
  58. Trackback: Repair: Nikkor-H.C 5cm f/2 RF | Richard Haw's Classic Nikkor Maintenance Site
  59. Trackback: Repair: RF-Nikkor-P.C 105mm f/2.5 | Richard Haw's Classic Nikkor Maintenance Site
  60. Trackback: Repair: Nikon MD-4 | Richard Haw's Classic Nikkor Maintenance Site
  61. Trackback: Repair: Nikkor-S 5.8cm f/1.4 Auto | Richard Haw's Classic Nikkor Maintenance Site
  62. Trackback: Repair: Nikon MD-3 Noisy Gear | Richard Haw's Classic Nikkor Maintenance Site
  63. Trackback: Repair: RF-Nikkor-P.C 8.5cm f/2 | Richard Haw's Classic Nikkor Maintenance Site
  64. Trackback: Oily Aperture Cleaning – Minolta MC Rokkor-PF 58mm f/1.4 – My Take on Photography and Diving (Underwater Photography Mostly)
  65. Trackback: Repair: Nikon 100mm f/2.8E | Richard Haw's Classic Nikkor Maintenance Site
  66. Trackback: Repair: AF-Nikkor 50mm f/1.8D | Richard Haw's Classic Nikkor Maintenance Site
  67. Trackback: Asahi Pentax 55mm f/1.8 Super-Multi-Coated Takumar – Disassembly and Clean-up – My Take on Photography and Diving (Underwater Photography Mostly)
  68. Trackback: Asahi Pentax 150mm f/4 Super-Multi-Coated Takumar – Disassembly and Clean-up – My Take on Photography and Diving (Underwater Photography Mostly)
  69. Trackback: Repair: Testing and Cleaning Junk Cameras (Nikon FE2) | Richard Haw's Classic Nikkor Maintenance Site
  70. Trackback: Repair: Helicoids (Video) | Richard Haw's Nikon Maintenance Site
  71. Trackback: Repair: W-Nikkor 3.5cm f/1.8 | Richard Haw's Nikon Maintenance Site
  72. Trackback: Repair: Bronica Helicoids | Richard Haw's Nikon Maintenance Site
  73. Trackback: Repair: Nikkor 105mm f/2.5K | Richard Haw's Nikon Maintenance Site
  74. Trackback: Repair: Nikkor-N 24mm f/2.8 Auto | Richard Haw's Nikon Maintenance Site
  75. Trackback: Repair: Tokina 28-70 AT-X PRO | Richard Haw's Nikon Maintenance Site
  76. Trackback: Repair: AF-Nikkor 70-210mm f/4 | Richard Haw's Nikon Maintenance Site
  77. Trackback: Repair: AF Micro-Nikkor 60mm f/2.8D | Richard Haw's Nikon Maintenance Site
  78. Trackback: Repair: Nikkor 20mm f/3.5 Ai-S | Richard Haw's Nikon Maintenance Site
  79. Trackback: Repair: Micro-Nikkor 105mm f/4 Ai | Richard Haw's Nikon Maintenance Site
  80. Trackback: Private: Repair: W-Nikkor.C 2.8cm f/3.5 | Richard Haw's Nikon Maintenance Site
  81. Trackback: Repair: Nikon SP 1/3 | Richard Haw's Nikon Maintenance Site
  82. Trackback: Repair: Nikon SP 2/3 | Richard Haw's Nikon Maintenance Site
  83. Trackback: Repair: Nikkor-T 10.5cm f/4 | Richard Haw's Nikon Maintenance Site
  84. Trackback: Repair: Nikon SP 3/3 | Richard Haw's Nikon Maintenance Site
  85. Trackback: Repair: Nikkor 105mm f/2.5 Ai-S | Richard Haw's Nikon Maintenance Site
  86. Trackback: Repair: Nikkor-Q.C 13.5cm f3.5 RF | Richard Haw's Nikon Maintenance Site
  87. Trackback: Repair: Nikkormat EL | Richard Haw's Nikon Maintenance Site
  88. Trackback: Repair: Nikkor 28mm f/2.8 Ai-S | Richard Haw's Nikon Maintenance Site
  89. Trackback: Repair: Nicca 3S (part 1) | Richard Haw's Nikon Maintenance Site
  90. Trackback: Repair: Nicca 3S (part 2) | Richard Haw's Nikon Maintenance Site
  91. Trackback: Repair: NIkkor 135mm f/3.5 Ai | Richard Haw's Nikon Maintenance Site
  92. Trackback: Repair: New-Nikkor 85mm f/1.8 | Richard Haw's Nikon Maintenance Site
  93. Trackback: Repair: AF-S DX NIKKOR 18-200mm f/3.5-5.6G ED VR II | Richard Haw's Nikon Maintenance Site
  94. Trackback: Repair: Nikkor-H.C 5cm f/2 (LTM) | Richard Haw's Nikon Maintenance Site
  95. Trackback: Lens Repair (5): Helicoids – My Take on Photography and Diving (Underwater Photography Mostly)
  96. Trackback: Nikon 35mm f/2.8 AiS – My Take on Photography (Lens Repairs Mostly)
  97. Trackback: Repair: Nikkor 85mm f/1.4 Ai-S | Richard Haw's Nikon Maintenance Site
  98. Trackback: Poor-man’s Summicron (貧者ズミクロン) Ricoh XR Rikenon 50mm f/2 – My Take on Photography (Lens Repairs Mostly)
  99. Trackback: Rikenon XR 50mm f/2 S – Fungus Cleaning – My Take on Photography (Lens Repairs Mostly)
  100. Trackback: Repair: Zoom-Nikkor 80-200mm f/4.5 | Richard Haw's Nikon Maintenance Site
  101. Trackback: Private: Repair: Zeiss Ikon Contax 2 Part 1 | Richard Haw's Nikon Maintenance Site
  102. Trackback: Repair: Zeiss Ikon Contax 2 Part 2 | Richard Haw's Nikon Maintenance Site
  103. Trackback: Private: Repair: Zeiss Ikon Contax 2 Part 3 | Richard Haw's Nikon Maintenance Site
  104. Trackback: Repair: Micro-Nikkor-P.C 55mm f/3.5 Auto | Richard Haw's Nikon Maintenance Site
  105. Trackback: Repair: Nikkor-H 300mm f4.5 Auto | Richard Haw's Nikon Maintenance Site
  106. Trackback: Repair: AF-Micro-Nikkor 55mm f/2.8 | Richard Haw's Nikon Maintenance Site
  107. Trackback: Repair: Nikon S (Part 1) | Richard Haw's Nikon Maintenance Site
  108. Trackback: Repair: Nikkor 180mm f/2.8 ED Ai-S | Richard Haw's Nikon Maintenance Site
  109. Trackback: Repair: W-Nikkor・C 3.5cm f/2.5 | Richard Haw's Nikon Maintenance Site
  110. Trackback: Repair: Nikon 35mm f/2.5 Series E | Richard Haw's Nikon Maintenance Site
  111. Trackback: Repair: Nikkor 35mm f/2 Ai | Richard Haw's Nikon Maintenance Site
  112. Trackback: Repair: New-Nikkor 50mm f/1.4 v1 | Richard Haw's Nikon Maintenance Site
  113. Trackback: Repair: New-Nikkor 50mm f/1.4 v2 | Richard Haw's Nikon Maintenance Site
  114. Trackback: Repair: Nikkor 85mm f/2 Ai | Richard Haw's Classic Nikon Repair and Review
  115. Trackback: Repair: Nikon EM | Richard Haw's Classic Nikon Repair and Review
  116. Trackback: Canon 50mm f/1.8 FD SC (Version I) Overhaul – My Take on Photography (Lens Repairs Mostly)
  117. Trackback: 5cm f/2 Nikkor-S Disassembly – My Take on Photography (Lens Repairs Mostly)
  118. Trackback: Repair: Nikkor-S.C 5cm f/1.4 | Richard Haw's Classic Nikon Repair and Review
  119. Trackback: Repair: Nikkor-Q.C 5cm f/3.5 | Richard Haw's Classic Nikon Repair and Review
  120. Trackback: Repair: W-Nikkor.C 3.5cm f/3.5 (LTM) | Richard Haw's Classic Nikon Repair and Review
  121. Trackback: Repair: Nikon FM2n | Richard Haw's Classic Nikon Repair and Review
  122. Trackback: Repair: Nikon 50mm f/1.8 Series-E | Richard Haw's Classic Nikon Repair and Review
  123. Trackback: Repair: Nikon FE | Richard Haw's Classic Nikon Repair and Review
  124. Trackback: Repair: Nikkormat FTn part 1 | Richard Haw's Classic Nikon Repair and Review
  125. Trackback: Repair: Nikkor 35mm f/2.8 Ai-S | Richard Haw's Classic Nikon Repair and Review
  126. Trackback: 200mm f/4 K Disassembly, Overhaul and Clean-up – My Take on Photography (Lens Repairs Mostly)
  127. Trackback: Nikon 135mm f/2.8 Nikkor-Q (and -QC) – My Take on Photography (Lens Repairs Mostly)
  128. Trackback: Repair: Nikkormat FTn part 2 | Richard Haw's Classic Nikon Repair and Review
  129. Trackback: Repair: Nikkorex F part 1 | Richard Haw's Classic Nikon Repair and Review
  130. Trackback: Minolta 50mm f/1.7 MD Rokkor – My Take on Photography (Lens Repairs Mostly)
  131. Trackback: Repair: Nikkorex F part 2 | Richard Haw's Classic Nikon Repair and Review
  132. Trackback: Mod: Converting Gadgets to Use 1.5v Batteries | Richard Haw's Classic Nikon Repair and Review
  133. Trackback: Repair: Nikkor-H 50mm f/2 Auto | Richard Haw's Classic Nikon Repair and Review
  134. Trackback: Repair: Nikkor-H•C 5cm f/2 LTM (collapsible) | Richard Haw's Classic Nikon Repair and Review
  135. Trackback: Repair: Nikkor 28mm f/2.8 Ai | Richard Haw's Classic Nikon Repair and Review
  136. Trackback: Repair: New-Nikkor 35mm f/2.8 (Early Ai) | Richard Haw's Classic Nikon Repair and Review
  137. Trackback: Repair: Nikkor-H.C 28mm f/3.5 Auto | Richard Haw's Classic Nikon Repair and Review
  138. Trackback: Repair: Nikon S2 part 1 | Richard Haw's Classic Nikon Repair and Review
  139. Trackback: Repair: Nikkor-Q•C 5cm f/3.5 (Collapsible) | Richard Haw's Classic Nikon Repair and Review
  140. Trackback: Repair: Nikon S2 part2 | Richard Haw's Classic Nikon Repair and Review
  141. Trackback: Repair: New-Nikkor 135mm f/2 | Richard Haw's Classic Nikon Repair and Review
  142. Trackback: Repair: Nikon S2 part 3 | Richard Haw's Classic Nikon Repair and Review
  143. Trackback: Repair: Nikon S2 part 4 | Richard Haw's Classic Nikon Repair and Review
  144. Trackback: The Chinese Biotar: Haiou-64 海鸥 58mm f/2 (SR) – My Take on Photography (Lens Repairs Mostly)
  145. Trackback: Repair: W-Nikkor•C 2.8cm f/3.5 (LTM) | Richard Haw's Classic Nikon Repair and Review
  146. Trackback: Repair: Micro-Nikkor 5.5cm f/3.5 (2/2) | Richard Haw's Classic Nikon Repair and Review
  147. Trackback: Repair: AF Micro-Nikkor 60mm f/2.8D | Richard Haw's Classic Nikon Repair and Review
  148. Trackback: Repair: New-Nikkor 20mm f/4 | Richard Haw's Classic Nikon Repair and Review
  149. Trackback: Repair: Nikkor 24mm f/2.8 Ai-S | Richard Haw's Classic Nikon Repair and Review
  150. Trackback: Repair: Nikon S3/S4 part1 | Richard Haw's Classic Nikon Repair and Review
  151. Ed
    Mar 25, 2020 @ 15:59:35

    Jewish donut=bagel

    Reply

  152. Trackback: Repair: Nikon S3/S4 part 2 | Richard Haw's Classic Nikon Repair and Review
  153. Trackback: Repair: Nikon S3/S4 part 3 | Richard Haw's Classic Nikon Repair and Review
  154. Trackback: Repair: Nikon FG | Richard Haw's Classic Nikon Repair and Review
  155. Trackback: Repair: Nikkor 135mm f/2.8 Ai-S | Richard Haw's Classic Nikon Repair and Review
  156. Trackback: Repair: Nikon FM3A | Richard Haw's Classic Nikon Repair and Review
  157. Trackback: Repair: Nikkor-T 10.5cm f/4 (S-Mount) | Richard Haw's Classic Nikon Repair and Review
  158. Trackback: Repair: Nikon S3/S4 part4 | Richard Haw's Classic Nikon Repair and Review
  159. Trackback: Repair: Nikon S3/S4 part 5 | Richard Haw's Classic Nikon Repair and Review
  160. Trackback: Repair: Canon 7 part 1 | Richard Haw's Classic Nikon Repair and Review
  161. Trackback: Repair: Canon 7 part 2 | Richard Haw's Classic Nikon Repair and Review
  162. Trackback: Repair: Nikon F part 1 | Richard Haw's Classic Nikon Repair and Review
  163. Trackback: Repair: New-Nikkor 135mm f/2.8 | Richard Haw's Classic Nikon Repair and Review
  164. Trackback: Repair: Nikon F part 2 | Richard Haw's Classic Nikon Repair and Review
  165. Trackback: Repair: Nikon F part 3 | Richard Haw's Classic Nikon Repair and Review
  166. Trackback: Repair: Nikkor 50mm f/1.8 Ai-S (Long-Nose) | Richard Haw's Classic Nikon Repair and Review
  167. Trackback: Repair: Nikkor 135mm f/3.5 Ai-S | Richard Haw's Classic Nikon Repair and Review
  168. Trackback: Repair: Nikkor-H 85mm f/1.8 Auto | Richard Haw's Classic Nikon Repair and Review
  169. Trackback: Repair: Nikon D3 (Foggy LCD) | Richard Haw's Classic Nikon Repair and Review
  170. Trackback: Repair: Zoom-Nikkor ED 360-1200mm f/11 Ai-S | Richard Haw's Classic Nikon Repair and Review
  171. Trackback: Repair: Nikon L35AF/AD | Richard Haw's Classic Nikon Repair and Review
  172. Trackback: Repair: Zoom-Nikkor 35-70mm f/3.3-4.5 AF (N) | Richard Haw's Classic Nikon Repair and Review
  173. Trackback: Repair: Ihagee Exa | Richard Haw's Classic Nikon Repair and Review
  174. Trackback: Nikon 35mm f/2.8 K Tear Down and Overhaul – My Take on Photography (Lens Repairs Mostly)
  175. Trackback: Nikon 135mm f/2.8 Nikkor K – a repair that was most challenging! – My Take on Photography (Lens Repairs Mostly)
  176. Trackback: The Legendary 105mm f/2.5 Nikkor K Tear Down and Overhaul – My Take on Photography (Lens Repairs Mostly)
  177. Trackback: AF Zoom-Nikkor 80-200mm f/2.8D ED (N) | Richard Haw's Classic Nikon Repair and Review
  178. Trackback: Nikkor-H•C 5cm f/2 (Leica Thread Mount) | Richard Haw's Classic Nikon Repair and Review
  179. Trackback: Repair: Seiki Kogaku S (part 1) | Richard Haw's Classic Nikon Repair and Review
  180. Trackback: Repair: Seiki Kogaku S (part 2) | Richard Haw's Classic Nikon Repair and Review

Leave a comment